Getting started
This page guides you through the installation of PDNS Manager and Powerdns as an authoritative nameserver on a Debian-based system. For other systems you may have to adjust some steps.
Prerequisites
In order to complete this tutorial, you have to:
-
Configure a MySQL or Maria DB server and a new empty database on it, preferably with separate user credentials only for the DNS stuff.
-
Install Apache
-
Use PHP in version 7.1 or above, and have the PHP apcu and json extension enabled
-
Make sure that you have PHP MySQL native driver installed and enabled
If you are using nginx, then please see nginx configuration for a sample configuration.
Install PDNS Manager
In order to install PDNS Manager, go to Download and get the latest stable version. Unpack the archive and put the content in a folder on your system (in the tutorial we will use /var/www/html). Configure an Apache VHost with a config like the following:
<VirtualHost _default_:443>
    ServerAdmin webmaster@localhost

    ServerName pdns.example.com

    DocumentRoot /var/www/html/frontend

    RewriteEngine On
    RewriteRule ^index\.html$ - [L]
    RewriteCond %{DOCUMENT_ROOT}%{REQUEST_FILENAME} !-f
    RewriteCond %{DOCUMENT_ROOT}%{REQUEST_FILENAME} !-d
    RewriteRule !^/api/\.* /index.html [L]

    Alias /api /var/www/html/backend/public
    <Directory /var/www/html/backend/public>
        RewriteEngine On
        RewriteCond %{REQUEST_FILENAME} !-f
        RewriteCond %{REQUEST_FILENAME} !-d
        RewriteRule ^ index.php [QSA,L]
    </Directory>

</VirtualHost>
Here, we assume that the hostname is "https://pdns.example.com".
To start the installation, open a browser and navigate to "https://pdns.example.com/setup".
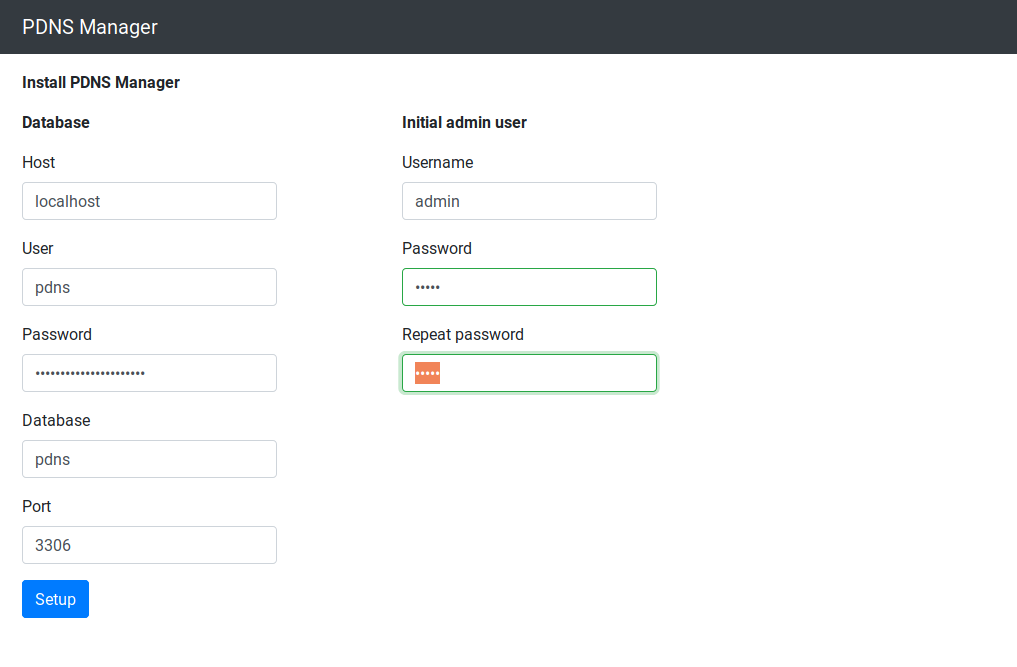
Here, you have to supply the database credentials:
- Host
- Username
- Password
- Database name
- Port
Provide a username and password for the first administrative user of PDNS Manager.
After you have completed all necessary steps, press Setup. Once the installation finished, you will be redirected to the login page where you can now log in using the username and password you provided earlier.
Install and configure Powerdns
Install Powerdns and the MySQL backend from the package sources:
sudo apt-get install pdns-server pdns-backend-mysql
Afterwards open /etc/powerdns/pdns.conf with an editor of your choice and enter the following:
allow-axfr-ips=127.0.0.1 <ip of your secondary nameserver>
config-dir=/etc/powerdns
daemon=yes
disable-axfr=no
guardian=yes
local-address=0.0.0.0
local-port=53
master=yes
slave=yes
module-dir=/usr/lib/x86_64-linux-gnu/pdns
setgid=pdns
setuid=pdns
socket-dir=/var/run
version-string=powerdns
include-dir=/etc/powerdns/pdns.d
Replace <ip of your secondary nameserver> with the ip of your secondary nameserver if it will get its data via AXFR, otherwise just leave it out.
Now you have to supply the configuration for the MySQL backend. Open /etc/powerdns/pdns.d/pdns.local.gmysql.conf with an editor of your choice and configure it as follows:
launch=gmysql

gmysql-host=localhost
gmysql-port=3306
gmysql-dbname=pdns
gmysql-user=pdns
gmysql-password=pdns
gmysql-dnssec=no
Replace the parameters with those matching your setup.
You can now restart powerdns and it should be up and running.
sudo service pdns restart
Have fun with your new DNS Server.